Support Emails — Tips and Tricks
Thanks for joining us for The Review Generator 💥 Crash Course 💥!
Timing Tips
In this section, we’re going to go over some timing techniques that will get you the best results.
Believe it or not, the amount of time between the service provided or product sold and the time you send out your review requests matters!
For best results, send out requests within 24 hours!
We’ve seen the best results with our clients when they send out a review request as soon as possible after a service is completed or a product has been sold. Customers are much more likely to leave you a review when their experience is fresh in their minds.
Think about it 💭… the longer you wait to send out a request for a review, the less likely a customer is going to remember their experience. If you send out a request right away, you may get back a long, detailed review filled with excellent keywords (great for SEO)! Waiting may cause you to get just a rating or no review at all.
What if you think the customer had a bad experience? 😤 Send out that request!
If you think a job didn’t go completely smoothly and your customer was NOT happy, you want to be sure to send them a review request. Our Review Blocker feature will help to stop that review from getting posted to a public review site.
Most people think, “This was a difficult customer, I don’t want to invite them to leave a review.” However, the trick is, if you make it easy for them to comment and can catch their feedback before it gets posted online, you’re getting the most out of our program.
Unhappy customers are usually happy that you asked them what they thought, too. If you respond in some kind of way that is polite and considerate, they are sometimes so happy they were heard they’ll go and reverse their negative review to something positive!
That’s it for our Timing Tips! Read on for Customization Tips. We’ll show you how you can completely customize the settings in your dashboard to give your customers the best experience possible.
PS. Don’t forget to bookmark that Magic Link!
Customization Tips
Now that you know the best time to send out your reviews, let’s talk about how to customize some things.
We want you to know that you have complete control over the message you send to your customers when you invite them to leave a review.
We’ve already set your account up to send our default messages, but if you’d like to know more or want to change your messages, we’ll explain how!
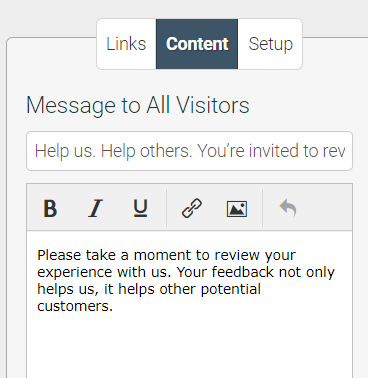
First, visit your login page by clicking here. This will take you to your dashboard. The first thing you should see is your Funnel Tab.
On this tab, you can change the review sites connected, the text on the landing page, and the setup of the page and how you collect reviews.
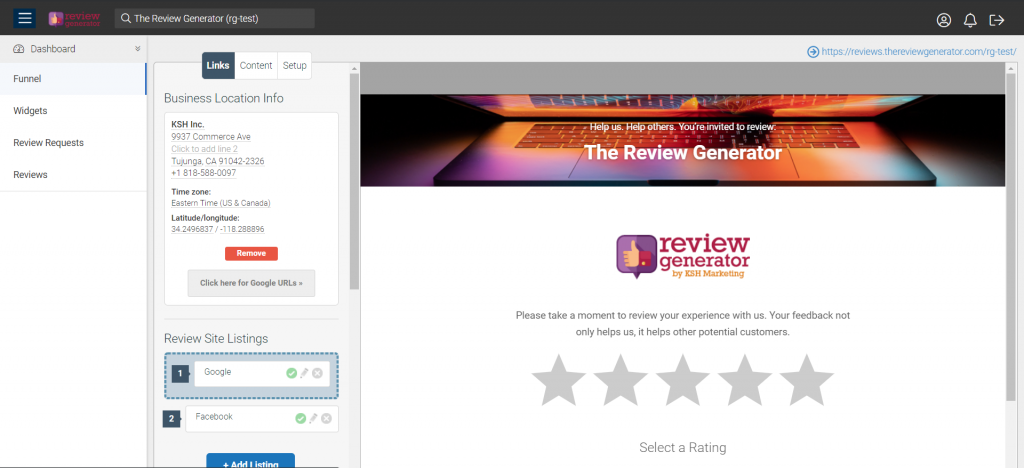
Changing Review Sites
We have already set up a couple of review sites for you but in this section, you are able to add and remove listings.
To remove a listing, simply click on the X next to the listing.
To add a listing, click on the button that says Add Listing and find the site you are looking for. If you want to add a custom link, scroll all the way to the bottom and you can add any type of link you’d like.
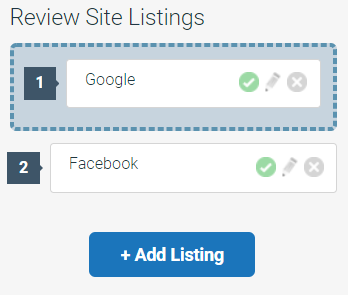
Landing Page Content
Moving over to the Content Tab, you can see the text that is displayed on your Landing Page. Feel free to play around in here to display a message that will speak to your customers.
Landing Page Setup
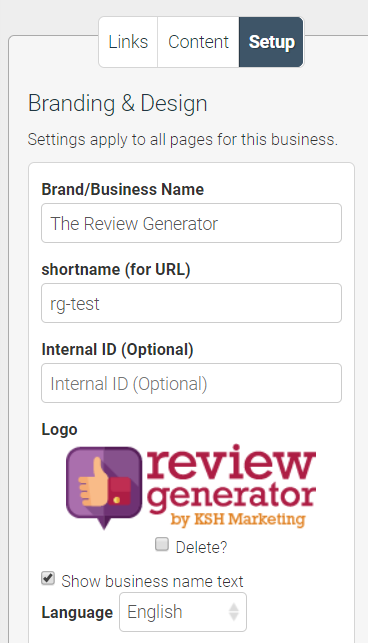
Next, on the Setup Tab, you’ll see a place to edit the header image and your logo. You can also change how you gather reviews. We default to 5-stars but you can change this to hearts, faces, or thumbs up and thumbs down.
Think about your customers and what would be the easiest way to get them to leave a review. Just keep in mind, if you change it to something other than 5 stars or 5 hearts, you may get a 3-star review on a public site.
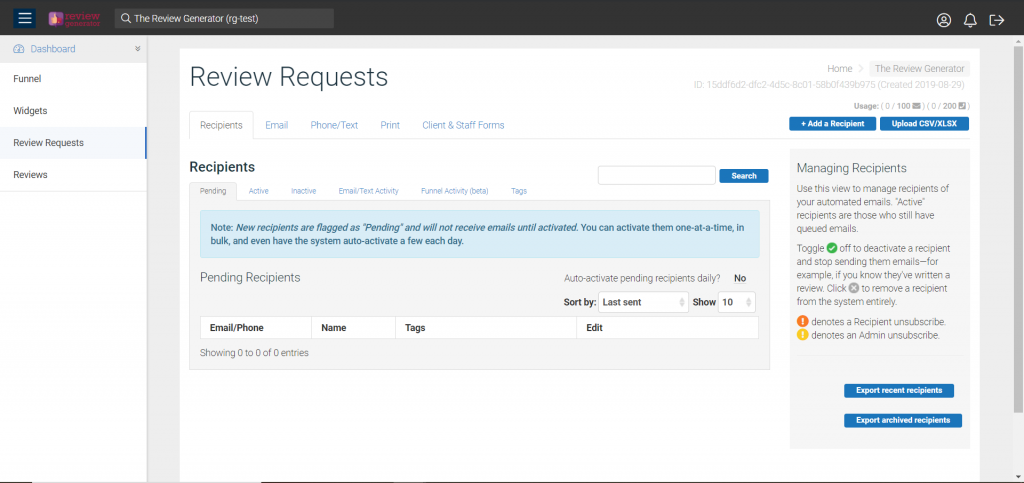
On the Review Requests Tab, you can change what is sent to your customers in the email and SMS message they receive.
Editing Email and SMS Messages
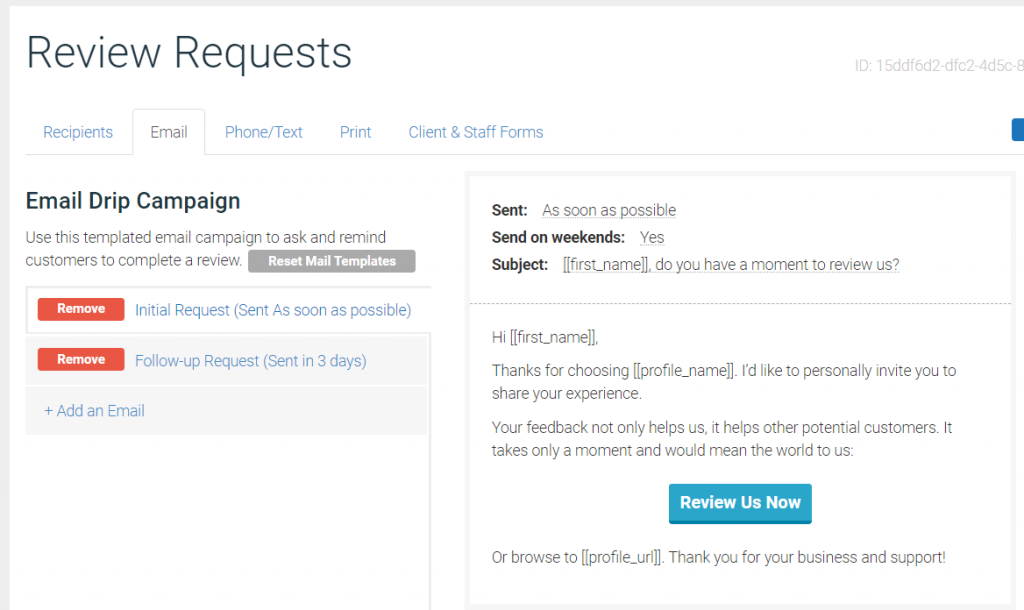
By default, you are set up with an email drip campaign that will send out two emails asking for reviews and one SMS message asking for a review. You can add or remove email and SMS messages in this section.
This is also the section you can edit the content in the email or SMS message. Simply find the message you want to edit, hover over the message area, and click on the pencil. You can add any text you would like in this area.
Note: SMS messages have a limit of 160 characters. Anything over this will be split up into two messages.
And there you have it! You now know how to customize your Landing Page and messages sent out to your customers!
Widget Tips
In addition to giving you the tools to gather reviews, we also supply you with widgets to display them on your website!

Visit the Widgets Tab on your dashboard to see all the available widgets for your site and email. Here you can find code to embed your Landing Page or a Review Us button on your website as well as copy and paste email signature snippets to potentially gather a review in every email you send out.
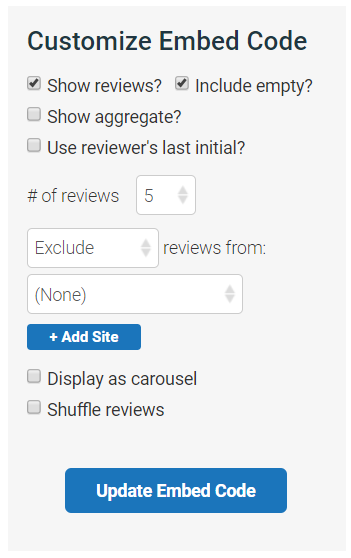
On the Review Tab, under Review Stream, you can find code to display your current reviews on your website.
Pro-tip: Post your reviews directly to your Twitter and Facebook pages!
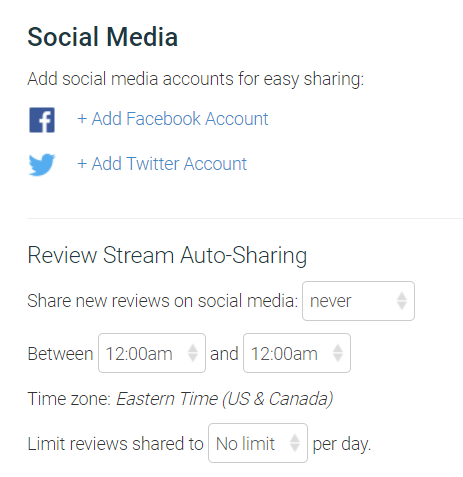
On the same tab as the Review Stream, click on Settings and you’ll find a place to connect your Facebook and Twitter accounts. Adjust the settings here and every time you get a new review, it will be posted to your social accounts!
If you need assistance with any of this along the way, please don’t hesitate to reach out! We will be able to set up any of these features for you.
Responding Tips
Responding to reviews, negative AND positive, can help grow the trust of your potential customers. When new customers see you engaging with all types of feedback, it shows you truly care about the customer experience.
You can do all this straight from your dashboard as well. Visit the Reviews Tab and you should see all your reviews in one place. In the Status column, click on Respond and it will open a new window so you can respond to that review.
Responding to Positive Reviews 🤗
When you leave a response to a positive review, thank the customer for taking the time to leave a review. If you remember anything about the experience, try to mention it here. This will ensure you have a customer for life.
Responding to Negative Reviews 😤
Responding to negative reviews is a very important aspect of your reputation management plan.
With our program, we give you the chance to stop the negative review from being posted to a public site. When a customer chooses a negative response, instead of being directed to a site like Google or Facebook, we send them to a contact form that gets sent straight to you. Respond to them as soon as possible! Research the situation to see what went wrong and offer solutions to make the customer happy.
When a negative review gets posted publicly, be sure to respond publicly. Give your potential customers both sides of the story and offer a solution to the unhappy customer.
We have seen negative feedback and reviews turn into positive ones when the business responds. Often times, customers just want to be heard. Let your customers know that you hear them and try to right what went wrong.
QR Code Tips
First off, what is a QR code? A QR code is a little square that you can scan with your smartphone and it will send you to a website.
If you visit your Widgets Tab, you can find your custom QR code located near the bottom right. Save this QR code to your computer and you can add it to different marketing elements. Here’s a couple of ideas:
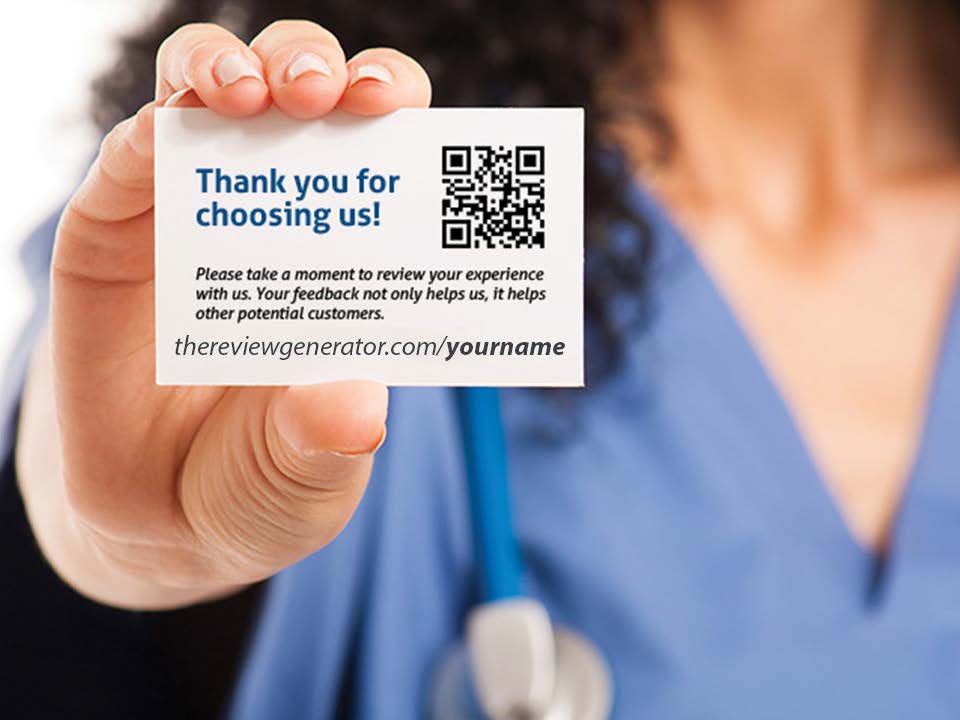
Add your QR code to business cards and hand them out to your customers after you complete a job or include them with the products you’ve sold.
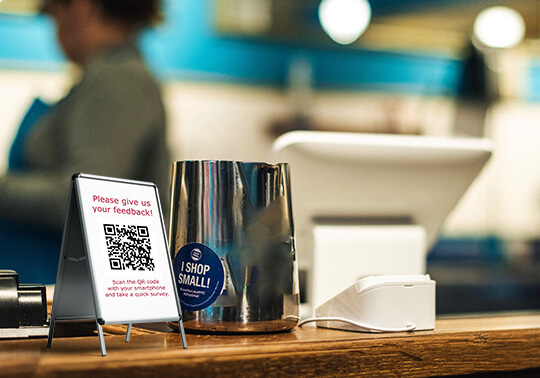
Create a stand near your registers that customers can scan when they complete a purchase.
In addition to using your QR code, there is another way that you can get customers to be more active in the reviewing process. If you don’t have access to your customer’s email address or phone number, use the Opt-In Form. You can find this on your Review Requests Tab under Client & Staff Forms.
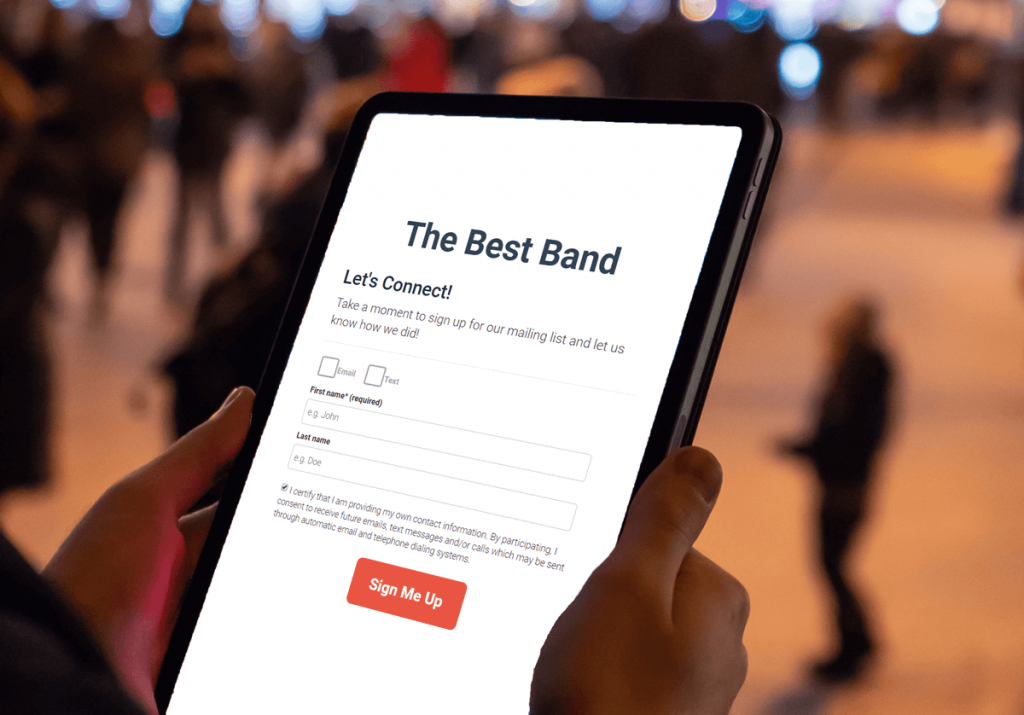
After you’ve completed a job or if you’re out at an event, simply pull up this form on your tablet and hand it over to the customer. When they fill it out, they will be sent a request to leave you a review AND you will now have their contact information. You can use this method to grow your contact list!
And there you have it! A quick overview of a couple of the different ways you can benefit from this program.
We hope you’re enjoying your free trial and the reviews have started rolling in. If we can help out with anything, please let us know!